Using the Tenant's Mobile App
Main Information
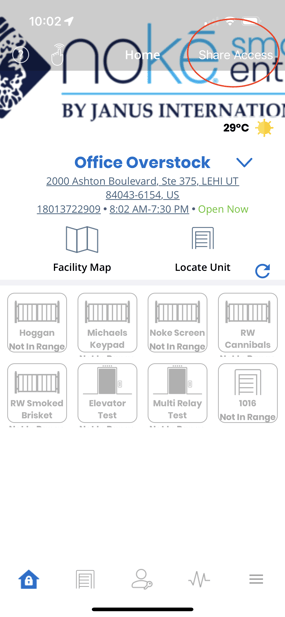
In the information section, tenants have the option to click for directions to the facility, directly call the facility, and view their access hours.

Tenant Mobile App Training

Once logged in, tap the '(?)' in the top left-hand corner.
The tenant learns how to use the mobile app by clicking through these options.

Locate Unit Feature

Tap 'Locate Unit' to help find the tenant's unit in the facility.
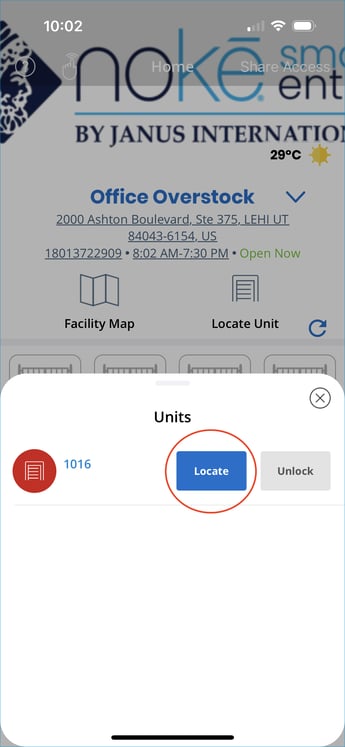
Tap 'Locate' to prompt the lock to blink and beep so the tenant finds their unit.
When in Bluetooth range, this icon lights up and the tenant can tap it to unlock the unit.
(Note: This image displays a greyed-out icon, which means not available.)
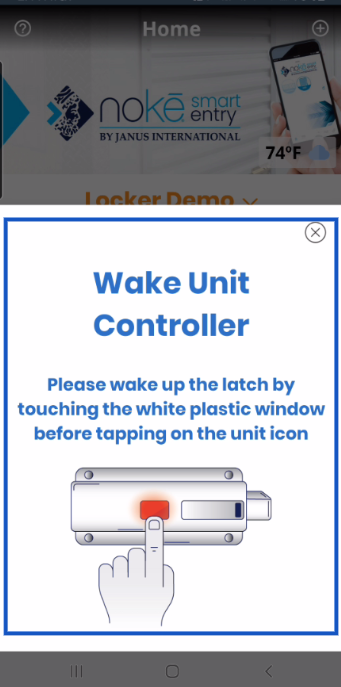
The app will detect if the lock is in sleep mode and requires that it is "woken up" before unlocking the door. A notification will guide the user on the necessary steps to take.
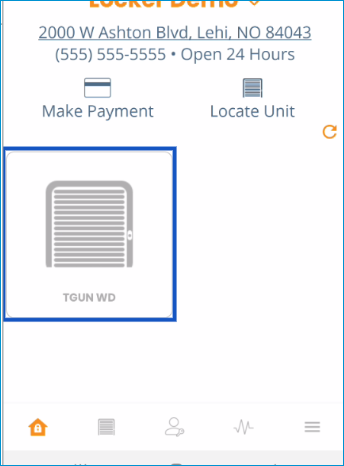
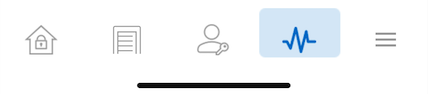
Tenant's Mobile App Icons
The 'Unit Door' icon opens a list of the user's
available units and entry points. When in range, the icon to unlock the device lights up for the user to tap.

Click the '(Person)' icon to open the User menu next. The tenant and any shared users they have set up will be listed here:
Tap the 'Activity' icon to open their Activity log. The tenant can
vie the access and monitor the activity of the users for their unit.

The final icon of the three horizontal lines is the settings page which has information including About (View info about version and build date), Account (View and manage account settings), Feedback (Submit comments, concerns, and other feedback), Fobs (View and manage key fobs on your account), Help & Support (Submit a support ticket or get answers to questions), Report an Issue (Report an issue to the facility), Settings (View and modify general system settings), and more.
Digital Key Sharing
Tap the 'Share Access' icon to add shared users.
The tenant adds the mobile number of the person they want to share access with, then clicks 'Next'.

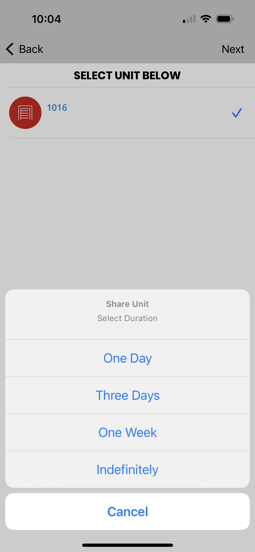
Select the unit you want to share access with.

The tenant then selects the duration of the share:
- One Day: Access and digital key automatically revoked in 24 hours.
- Three Days: Access and digital key automatically revoked in 72 hours.
- One Week: Access and digital key automatically revoked in 7 days.
- Indefinitely: Access and digital key will not be automatically revoked, so removing access would have to be performed manually by the tenant.
(Note: Only the tenant can invite shared users to their account, other shared users cannot.)
Next, the shared user that was just created will receive a text invite to download and create a login for the mobile app to complete setting up his own digital key.
The tenant can manage his Shared Users at any time by tapping the User menu and then tapping the (People) icon and clicking on that user name.
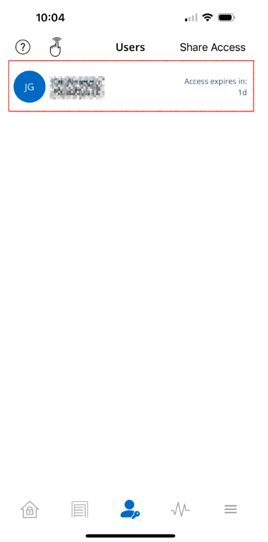
Tap the shared user's name to access more options.

The tenant can view and make changes to the units the user has access to, view this user's activity, and revoke his digital key. Tap Delete User to revoke access.
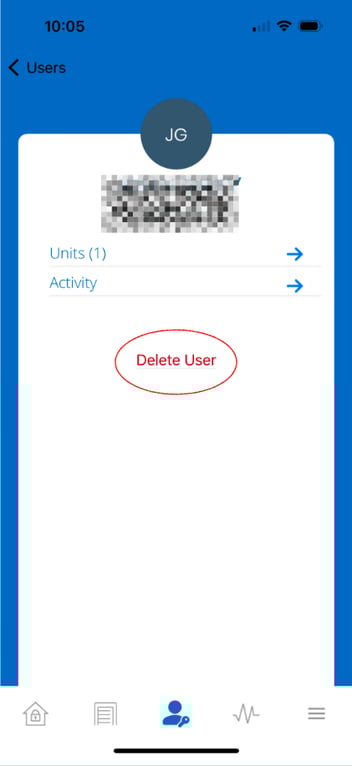
The user has now been removed from this account and can uninstall the app on his device. If the user returns to the facility, access will be denied.
Navigating the Manager Mobile App
The Storage Smart Entry by Nokē Mobile App offers facility managers an intuitive interface to manage facility operations, assist tenants, and enhance customer engagement. Below is a comprehensive guide to help you navigate the app and its key features.
Getting Started
- Unlock Your Device: Open the Storage Smart Entry by Nokē app on your phone or iPad.
Top Navigation Bar
-
Search or Camera Feature:
- Quickly find unit information by typing or using the camera to scan a unit number (requires camera permissions).
-
Add Menu (+ Sign):
- Tap to add a fob for a tenant or a unit controller to the system.
-
Demo Mode (Person Icon):
- Access Demo Mode to simulate the app experience from a tenant’s perspective.
Understanding Demo Mode
Purpose:
- Demonstrates the tenant interface to potential customers.
Benefits:
- Highlights features like opening entry points, unit access, locating units, and tracking activity.
How to Access:
- Tap the Demo Mode icon in the header.
- Select "Yes" to activate Demo Mode.
Features Demonstrated:
- Opening entry points, unlocking units, locating units, and activity monitoring.
Exiting Demo Mode:
- Tap the Demo Mode icon.

- Select "End" to return to the manager interface.
Home Page
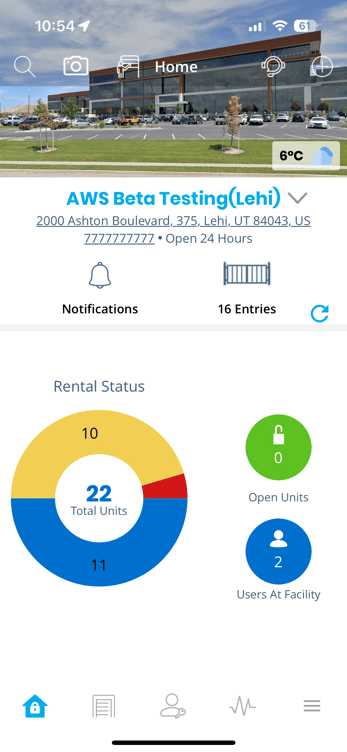
- Facility Information:
-
- Displays facility name, address, phone number, and hours of operation.
- Note: The Hours of Operation displayed in the app are based on the user's assigned schedule. If a user is assigned the 24 Hours schedule, their app will show "Open 24 Hours." However, if a user is assigned a different schedule (e.g., 9:00 AM - 5:00 PM), that schedule will be displayed when they log in to the mobile app.
- Switch between facilities using the dropdown menu.
- Displays facility name, address, phone number, and hours of operation.
-
Notifications:
- View facility notifications and updates under the "What's New" section.
-
Entries:
- View and unlock entry points remotely.
-
Unit Status:
- Use the virtual lock walk feature to check units with open doors or requiring follow-up.
-
Color Wheel Filters:
- Yellow: Occupied units.
- Blue: Vacant units.
- Red: Delinquent units.
-
Refresh:
- Tap to update information and activity.
-
Users at Facility:
- Provides a real-time count of users currently onsite.
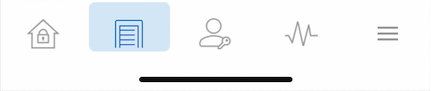
Bottom Navigation Bar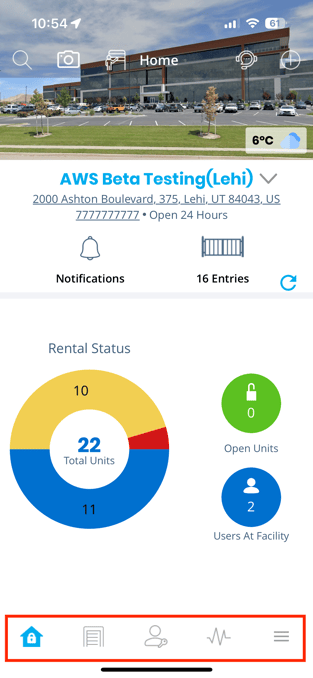
-
Storage Door Icon:
- Opens the Entry Page to view unit status or unlock units.
-
Person Icon:
- Access the Users Page for a list of users at the facility.
-
Jagged Lines Icon:
- Opens the Activity Page to view and filter recent activity.
-
Three Lines Icon:
- Access the Settings Page for additional tools like Help & Support, Feedback, and more.
Page-Specific Features
Entry Page:
- View unit status.
- Remotely unlock vacant units or occupied units shared with the manager.
- Use filters to sort units by status (e.g., available units).
Users Page: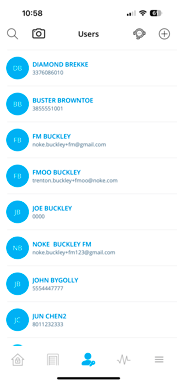
- List of all users at the facility.
- Tap a user’s name for more details.
Activity Page: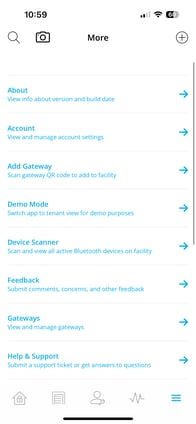
- Displays recent facility activity.
- The default view shows the last 24 hours.
- Use filters to refine the list.
Settings Page:
- Access tools like Help & Support, Feedback, and facility settings.
Manager App Navigation and Demo Mode
Understanding Demo Mode on the Mobile App
Demo Mode is a feature in the Storage Smart Entry by Nokē Mobile App designed to showcase the app experience from a tenant's perspective. It is a valuable tool for facility managers and employees when engaging with prospective tenants, offering a hands-on demonstration of the app's functionality.
What is Demo Mode?
-
Purpose:
- Transforms the manager's version of the app into the tenant interface, replicating how the app will look and function for tenants.
- Allows potential customers to experience the convenience and features of the Nokē Smart Entry system.
-
Availability:
- Only accessible in the Storage Smart Entry by Nokē Mobile App.
- Not available in other Nokē apps.
How Demo Mode Benefits Facility Managers
-
Sales Tool:
- Show potential tenants the seamless experience of managing access to their units through the app.
- Highlight key features that set your facility apart from traditional storage operations.
-
Feature Highlights:
- Opening Entry Points: Demonstrate how tenants can easily open facility gates or doors.
- Unit Access Without a Physical Lock: Show the convenience of unlocking units with a single tap.
- Locate Unit Feature: Guide tenants to their unit effortlessly.
- Activity Tracking: Showcase how tenants can monitor activity associated with their unit.
How to Use Demo Mode
-
Access the Demo Mode Icon:
- Open the Storage Smart Entry by Nokē Mobile App.
- Locate the icon in the header resembling a person standing next to a unit.

-
Enter Demo Mode:
- Tap the icon.
- When prompted, select "Yes" to activate Demo Mode.
-
Select a Unit:
- Choose a unit for the demo, ideally one similar to the unit of interest.
- Only ‘Available’ units will appear for selection.

-
Demonstrate the App:
- Mimic the tenant experience using the selected unit.
- Highlight illuminated icons when near entry points or the demo unit.
- Show the functionality of operating devices within the app.
-
Exit Demo Mode:
- Tap the same icon used to enter Demo Mode.
- When prompted, select "End" to return to the manager interface.

How to Make the Most of Demo Mode
- Use real-time demonstrations to emphasize the advantages of the Nokē Smart Entry system over traditional storage systems.
- Explain additional features and benefits offered at your facility alongside the app integration.
- Tailor the experience to prospective tenants' specific needs, reinforcing the ease of use and enhanced security features.
By leveraging Demo Mode, you can provide a compelling, interactive demonstration that enhances your sales pitch and helps close deals with potential customers.
For more information, click below:
Managing Employee/Tenant Accounts
Using the Tenant's Mobile App
Understanding the Demo Mode on the Mobile App