Entry Message Overview
The Entry Message feature allows facility managers to communicate directly with tenants via the tenant’s mobile app. It provides a convenient way to send important updates, such as maintenance notifications or facility announcements when tenants interact with designated entry points. To enable this feature, contact Nokē Smart Entry Support, and once enabled, a new "Entry" tab will appear under the Messages section.
How to Enable Entry Messages
To activate Entry Messages at your facility:
-
Contact Nokē Smart Entry Support:
- Reach out to Nokē Smart Entry Support to enable the Entry Message feature at your facility.
-
Log In to the Web Portal:
- After the feature is enabled, log into the Web Portal.
- Note: You may need to log out and log back in for the correct options to appear.
Setting Up Entry Messages
Once the feature is enabled, you can configure and send Entry Messages to tenants as follows:
-
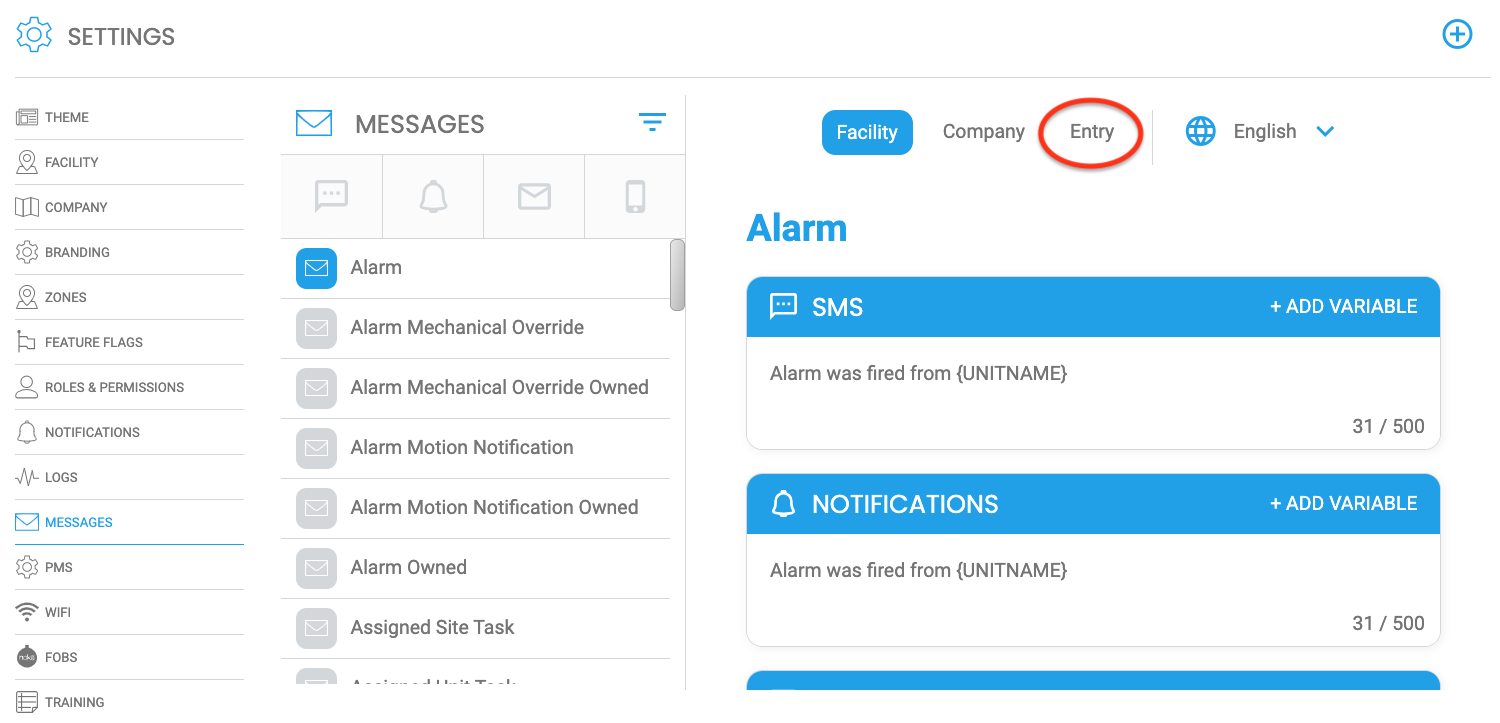
Navigate to the Entry Tab:
- In the Web Portal, go to the Settings tab.
- From there, go to the Messages section and click on the "Entry" tab to view current active messages and create new ones.
-
Create a New Entry Message:
- Click the "+" (plus) icon to open the form for entering a new message.
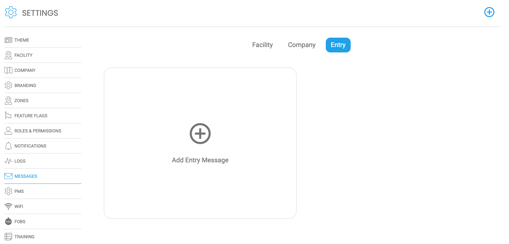
- Click the "+" (plus) icon to open the form for entering a new message.
Entry Message Information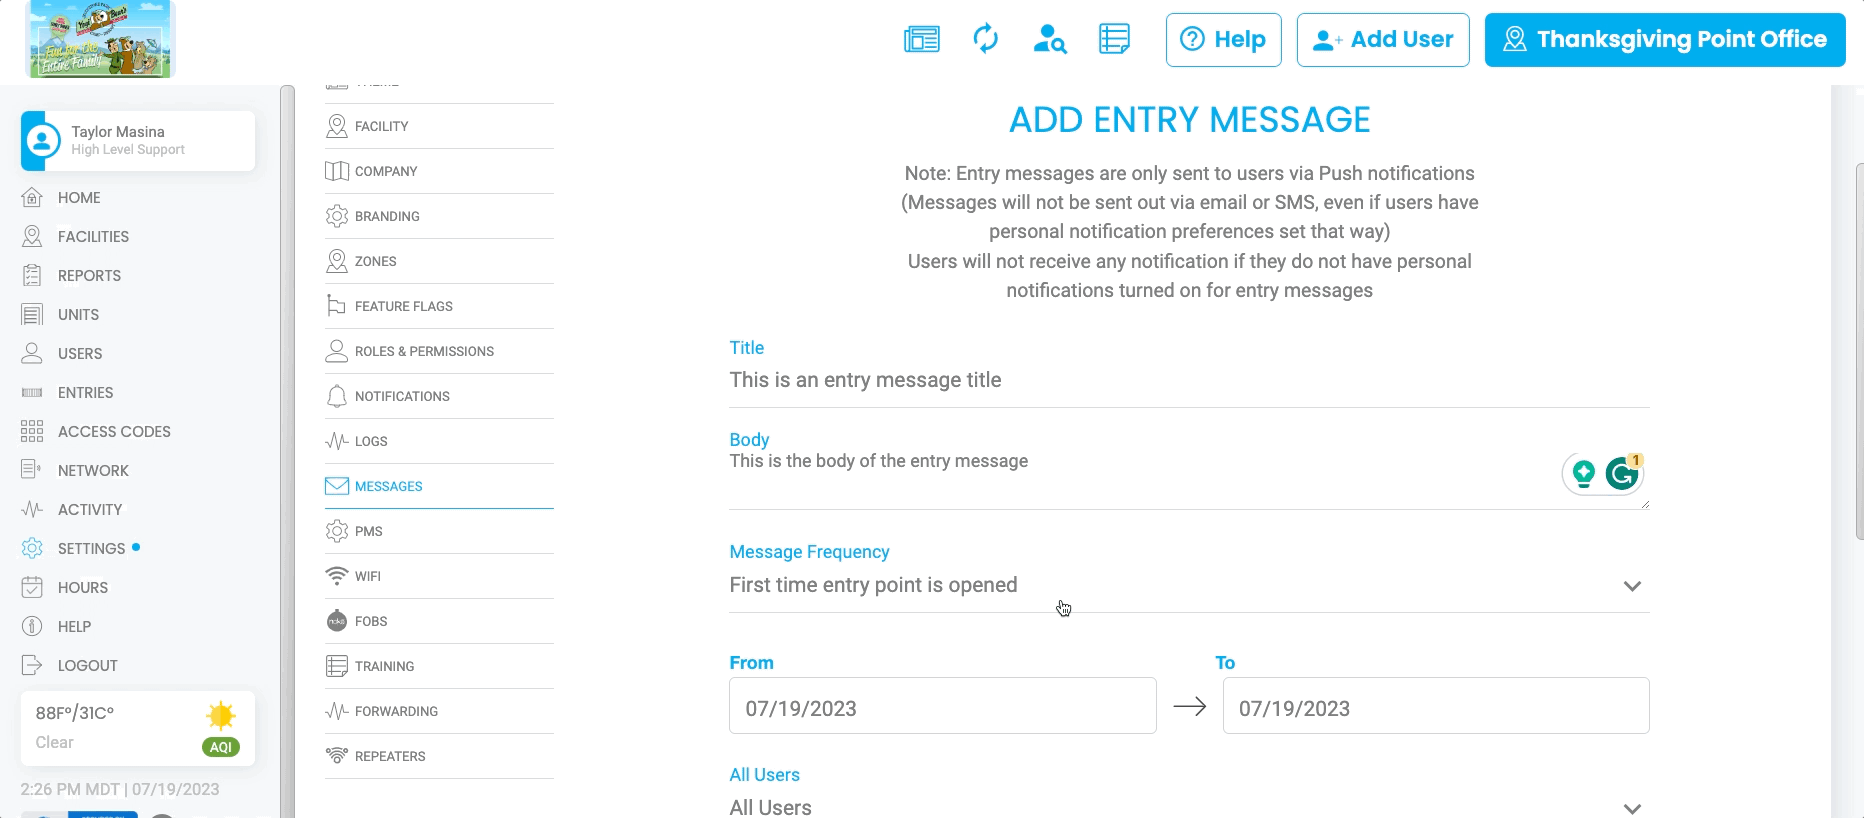
When creating an Entry Message, you’ll need to fill out the following fields:
-
Title:
- Enter a title for the message that will be sent to users.
-
Body:
- Write the body of the message you wish to send to tenants.
-
Message Frequency:
- Choose whether the notification should be sent to users only the first time they use the entry point within the selected date range or every time they use it during that period.
-
Date Range:
- Specify the date range during which the entry message will be sent.
-
Users:
- Decide whether the message should go to all users, specific users, or users in a specific zone.
-
Entry:
- Choose which entry or entries should trigger the message.
Important Notes About Entry Messages
- Entry messages are only sent via Push Notification. They will not be delivered by email or SMS.
- Tenants will only receive the message if they have Personal Notifications turned on for Targeted Notifications.
- If a tenant does not have Push Notifications enabled, they will not receive any notifications.
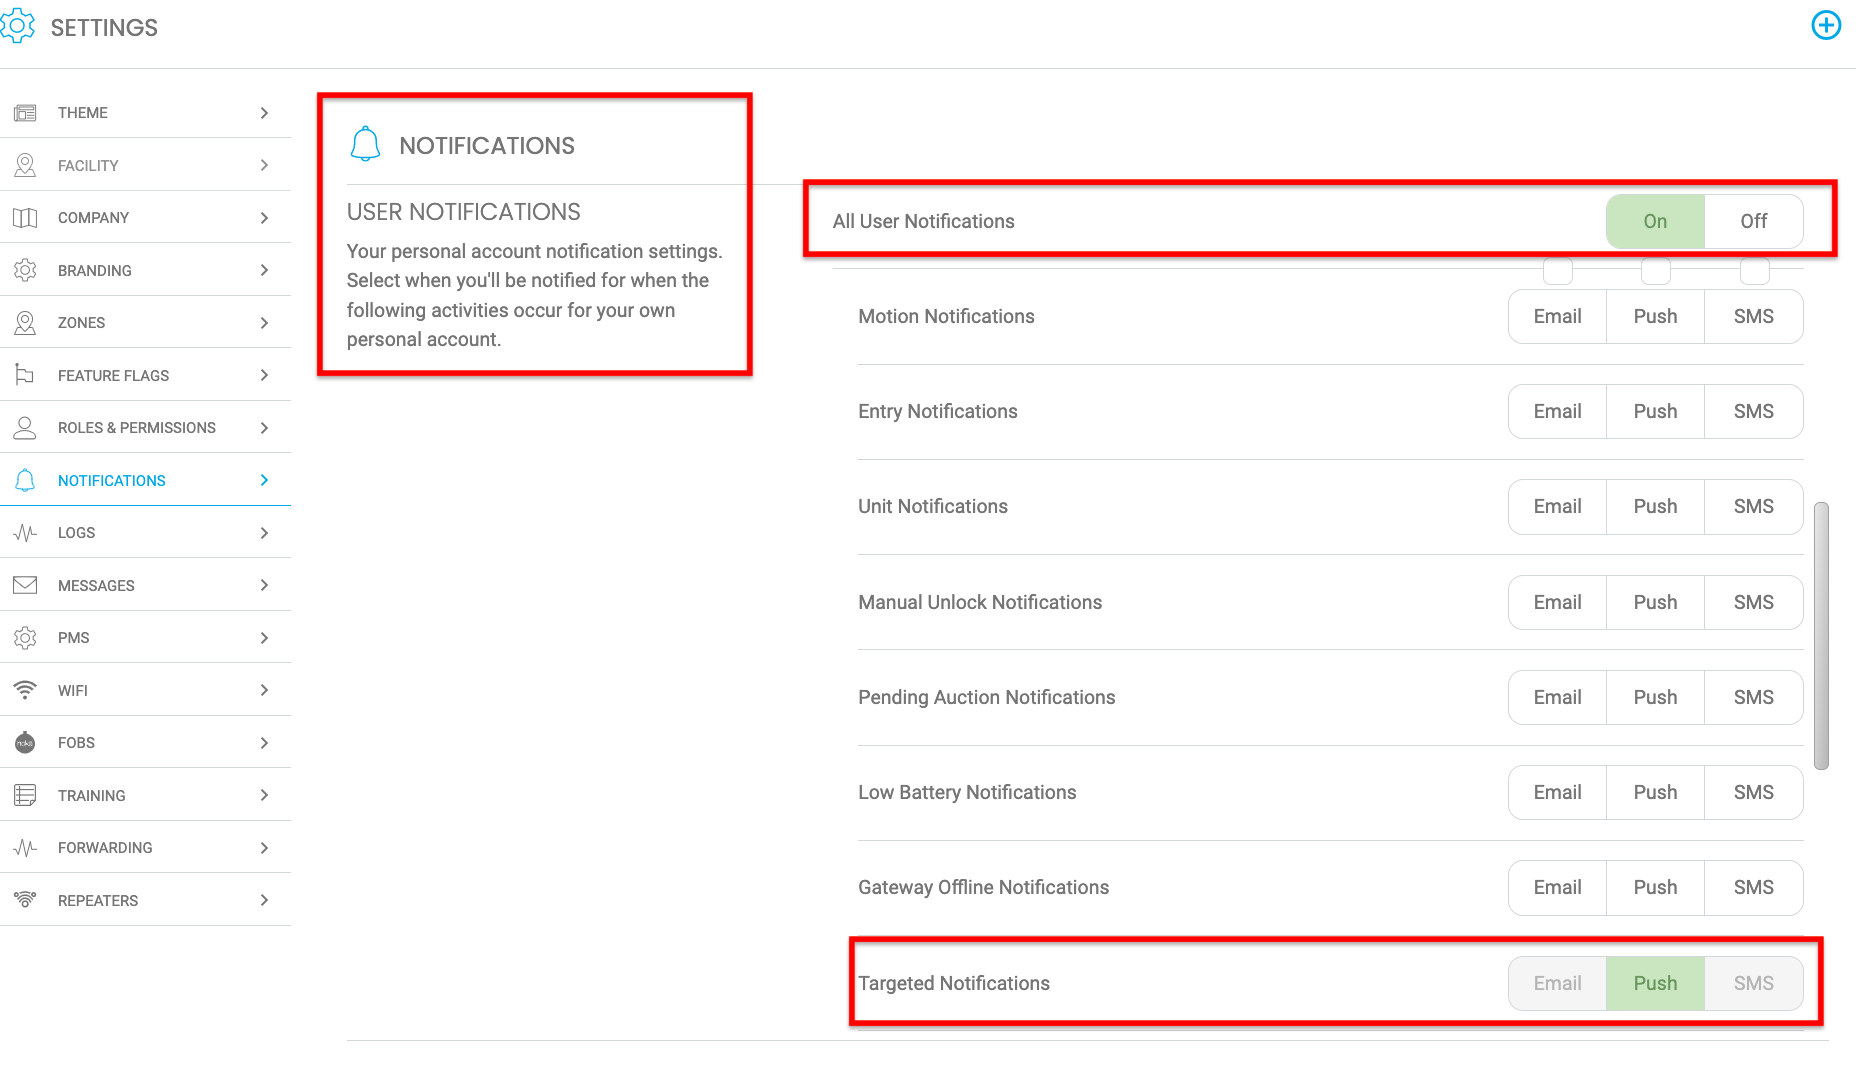
How to Ensure Tenants Receive Entry Messages
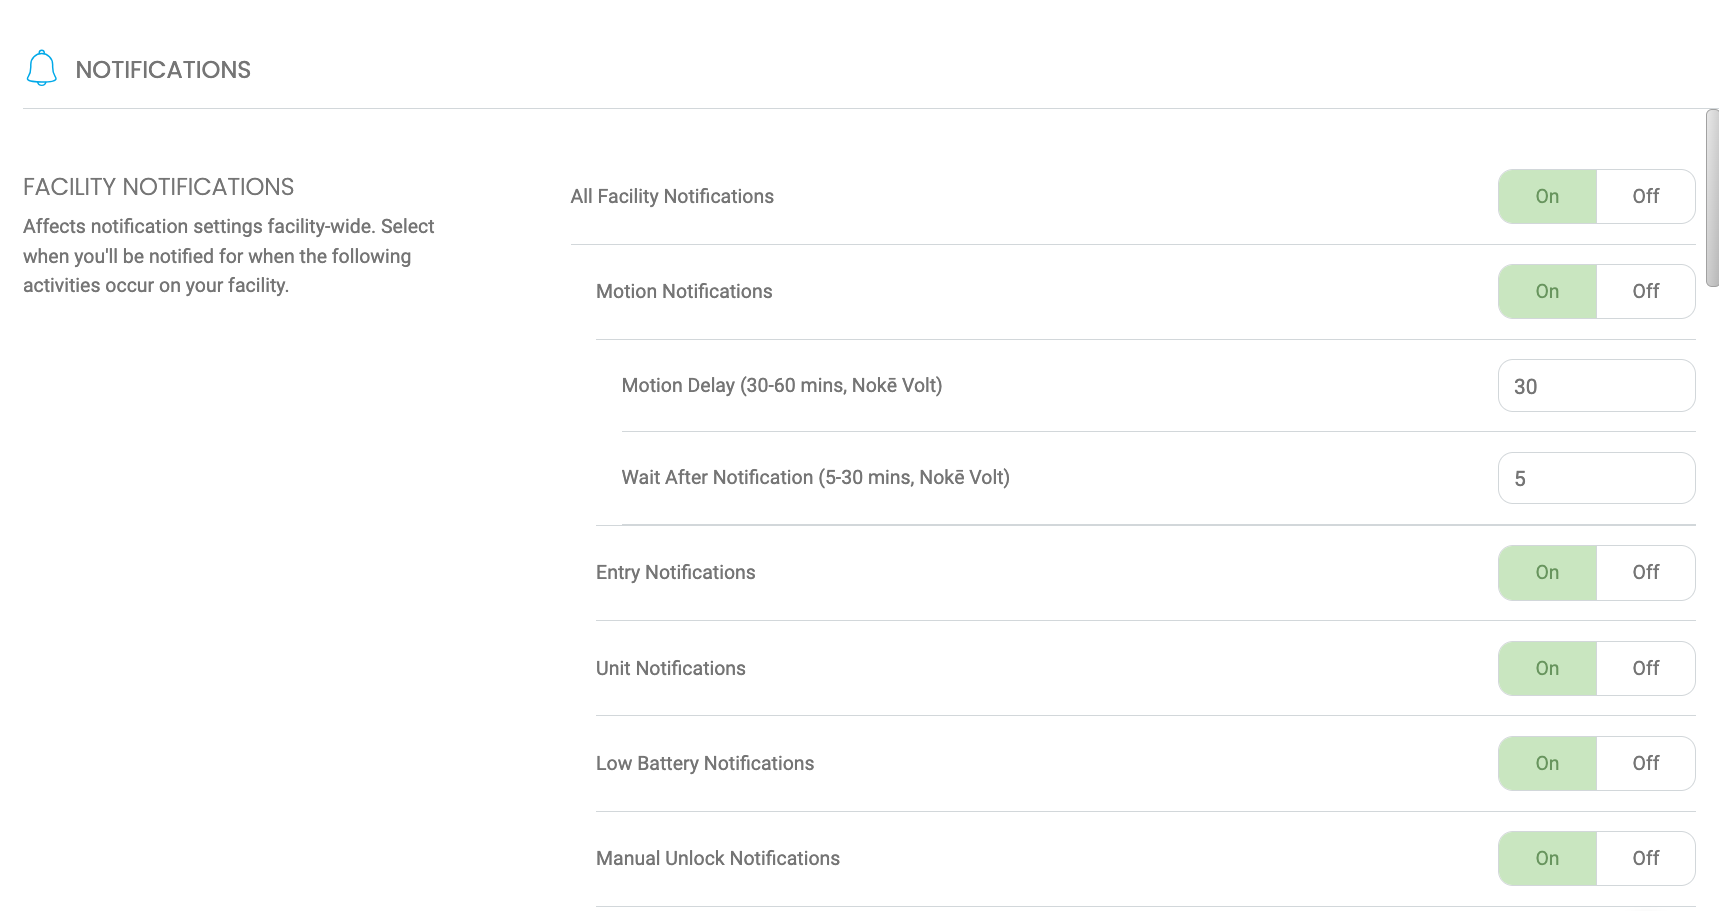
- Enable Notifications for the Facility in the Web Portal:
- From the Web Portal, click Settings.
- Click Notifications.
- Under the Facility Notifications section turn All Facility Notifications to On.
2. Enable Individual User Notifications in the Web Portal:
- From the Web Portal, click Users.
- Locate and select the user you want to edit.
- Click the Settings (gear) icon in the top-right corner.
- Select Notifications and turn all User Notifications On.
- Ensure that Targeted Notifications is set to Push.
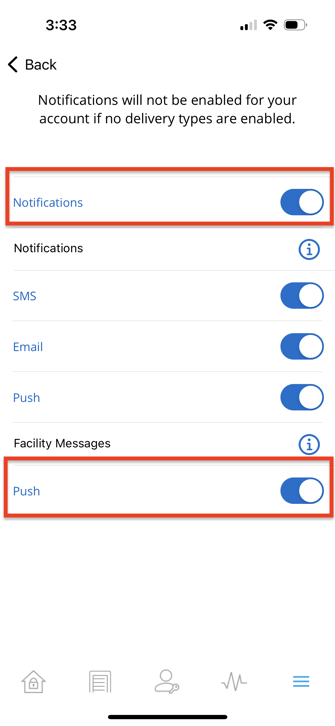
3. Enable Individual User Notifications in the Mobile App:
- From the tenant's mobile app, tap Settings (three lines in the bottom right corner).
- Tap Settings again from the list of settings.
- Tap Notification Settings.
- Turn Notifications to On.
- Scroll to Facility Messages and turn Push to On.
Once all these settings are configured, tenants will start receiving Entry Messages via Push Notification when they interact with designated entry points at your facility. This feature ensures that facility managers can effectively communicate important information to tenants, enhancing the overall management and experience at your facility.
Permission Needed
- Manage Entry Messages